
Cloudflare worker를 이용하여 폰트 변경하기
- 도메인 연결에 이어, 폰트 변경까지 해보도록 하자
- 구글링 이후, 아무도 이런 글을 쓰지 않았음을 알게 되었다 ⬇️ 결과물은 다음과 같다! tailored notion을 사용한 것 처럼 바꿔주는 마법의 기술.
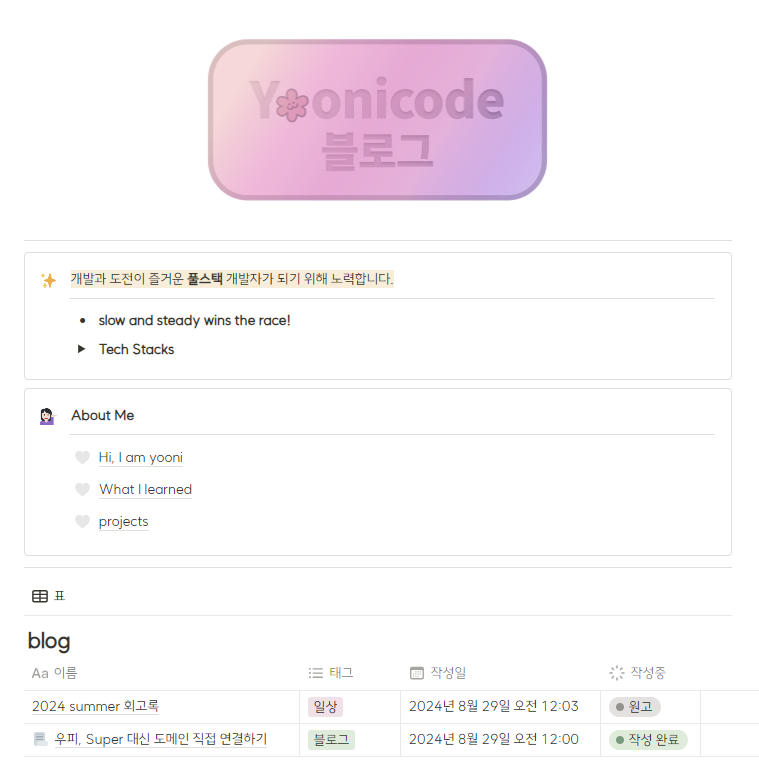
✨ 아래 방식들로 변경할 수 있다. custom script를 활용해서 바꿔보기로 했었다.
1. Cloudflare의 페이지 규칙(Page Rules) 설정
- Cloudflare를 이용해 개인 도메인과 노션 페이지를 연결한 후, 해당 도메인에 대한 규칙을 설정하여 CSS를 주입할 수 있는 방식으로 접근합니다.
- 하지만 기본적으로 Cloudflare에서만으로는 CSS 주입 기능을 제공하지 않기 때문에, Workers나 외부 서비스와 같은 추가적인 도구가 필요합니다.
2. External 서비스 또는 Custom Script 활용
- Custom Script: 도메인에 접속할 때 CSS를 주입하는 스크립트를 추가할 수 있습니다. 예를 들어, 아래와 같은 사용자 스크립트를 Cloudflare Workers에 추가하여 폰트를 변경할 수 있습니다.
3. 사용자 스타일 적용(브라우저 확장 프로그램)
- 사용자의 브라우저에 Stylus와 같은 확장 프로그램을 설치하여, 특정 도메인에 대해서만 CSS를 적용하도록 할 수도 있습니다.
- 예를 들어, 사용자는 노션 페이지를 열 때 특정 폰트로 보이도록 브라우저에서만 CSS를 적용할 수 있습니다.
4. 노션 Embed 활용
- 노션의 자체 기능으로는 페이지의 기본 폰트를 변경하는 기능이 제한적입니다. 따라서 위와 같은 방법 외에도, 특정 CSS 적용이나 폰트 변경을 위해 외부에서 Embedding 하는 방법을 사용할 수 있습니다.
⚠️ 주의사항
- Cloudflare Workers는 무료로 제공되지만, 사용량에 따라 제한이 있을 수 있습니다.
- 폰트 변경 시에는 웹 폰트를 사용해야 하며, 웹에서 접근 가능한 URL이 있어야 합니다.
이를 위해 사용한 코드는 다음과 같다.
addEventListener('fetch', event => {
  event.respondWith(handleRequest(event.request));
});

async function handleRequest(request) {
  const response = await fetch(request);
  let text = await response.text();

  // 원하는 CSS를 HTML에 주입합니다.
  const customCSS = `
    <style>
      body {
        font-family: "Your Custom Font", sans-serif !important;
      }
    </style>
  `;
  text = text.replace('</head>', customCSS + '</head>');

  return new Response(text, {
    headers: { 'Content-Type': 'text/html' }
  });
}
이걸 지난번의 step2에 집어넣어 만든 코드와 섞으면
class HeadRewriter {
  element(element) {
    if (GOOGLE_FONT !== '') {
      element.append(`<link href="https://fonts.googleapis.com/css?family=${GOOGLE_FONT.replace(' ', '+')}:Regular,Bold,Italic&display=swap" rel="stylesheet">
      <style>* { font-family: "${GOOGLE_FONT}" !important; }</style>`, {
        html: true
      });
    }

    // 추가하고 싶은 CSS 스타일
    const customCSS = `
    <style>
      body {
        font-family: "Your Custom Font", sans-serif !important;
        color: #333333; /* 글자 색상 */
      }
      h1, h2, h3, h4, h5, h6 {
        font-family: "Your Custom Heading Font", serif !important;
        color: #000000; /* 제목 색상 */
      }
      .notion-topbar {
        background-color: #ffffff; /* 상단 바 배경색 */
      }
    </style>
    `;

    element.append(customCSS, { html: true });

    element.append(`<style>
    div.notion-topbar > div > div:nth-child(3) { display: none !important; }
    div.notion-topbar > div > div:nth-child(4) { display: none !important; }
    div.notion-topbar > div > div:nth-child(5) { display: none !important; }
    div.notion-topbar > div > div:nth-child(6) { display: none !important; }
    div.notion-topbar-mobile > div:nth-child(3) { display: none !important; }
    div.notion-topbar-mobile > div:nth-child(4) { display: none !important; }
    div.notion-topbar > div > div:nth-child(1n).toggle-mode { display: block !important; }
    div.notion-topbar-mobile > div:nth-child(1n).toggle-mode { display: block !important; }
    </style>`, {
      html: true
    });
  }
}
⬇️ 작동 원리.. 이를 바탕으로 원하는대로 커스텀 할 수 있게 되었다.
customCSS 변수에 원하는 CSS 스타일을 정의 → element.append(customCSS, { html: true });를 통해 HTML 문서의 <head>에 삽입
font-family: 기본 텍스트와 제목에 사용할 폰트를 지정합니다.color: 텍스트와 제목의 색상을 지정합니다.background-color: 상단 바의 배경색을 지정합니다.
여기서 끝난 줄 알았겠지만, 사실 google fonts를 사용할 계획이였기에 @font-face 규칙을 사용하는 코드로 변경해준다.
HeadRewriter 클래스에서 @font-face를 추가하고, 해당 폰트를 적용하는 스타일을 정의하도록!
class HeadRewriter {
  element(element) {
    const customCSS = `
    <style>
      /* SUITE-Regular 폰트 정의 */
      @font-face {
        font-family: 'SUITE-Regular';
        src: url('https://fastly.jsdelivr.net/gh/projectnoonnu/noonfonts_2304-2@1.0/SUITE-Regular.woff2') format('woff2');
        font-weight: 400;
        font-style: normal;
      }

      /* 전체 페이지에 SUITE-Regular 폰트 적용 */
      body, .notion-page, .notion-page-content, .notion-frame, .notion-text, .notion-header, .notion-title, .notion-content {
        font-family: 'SUITE-Regular', sans-serif !important;
      }

      /* 특정 요소에 추가 적용 */
      .notion-topbar, .notion-sidebar, .notion-page-block, .notion-collection-view, .notion-collection-title, .notion-collection-item {
        font-family: 'SUITE-Regular', sans-serif !important;
      }

      /* 상단 바 배경색 */
      .notion-topbar {
        background-color: #ffffff;
      }
    </style>
    `;

    element.append(customCSS, { html: true });

    element.append(`<style>
    div.notion-topbar > div > div:nth-child(3) { display: none !important; }
    div.notion-topbar > div > div:nth-child(4) { display: none !important; }
    div.notion-topbar > div > div:nth-child(5) { display: none !important; }
    div.notion-topbar > div > div:nth-child(6) { display: none !important; }
    div.notion-topbar-mobile > div:nth-child(3) { display: none !important; }
    div.notion-topbar-mobile > div:nth-child(4) { display: none !important; }
    div.notion-topbar > div > div:nth-child(1n).toggle-mode { display: block !important; }
    div.notion-topbar-mobile > div:nth-child(1n).toggle-mode { display: block !important; }
    </style>`, {
      html: true
    });
  }
}
-
특정요소 추가적용이라 써있는데, 사실 전체 적용이 안돼서 개발자도구로 뜯어보고 다시 설정해서 사용중이다.
✨ 문제점..
- worker를 통해서 코드를 삽입하는 것이다 보니 특정 도메인을 통하는 경우에만 적용된다
- 무슨 이유인지는 모르겠으나 뒤로가기 버튼을 누르면 로그인을 해야된다고 뜨는 경우가 있다
→ 해결 방안 모색 중… 우선 보이는 부분은 문제가 없으니 사용하기로 결정하였다@!
댓글